viernes, 31 de marzo de 2023

How To Safely Stop During A Rejected Takeoff

By Boldmethod
02/02/2023

Boldmethod

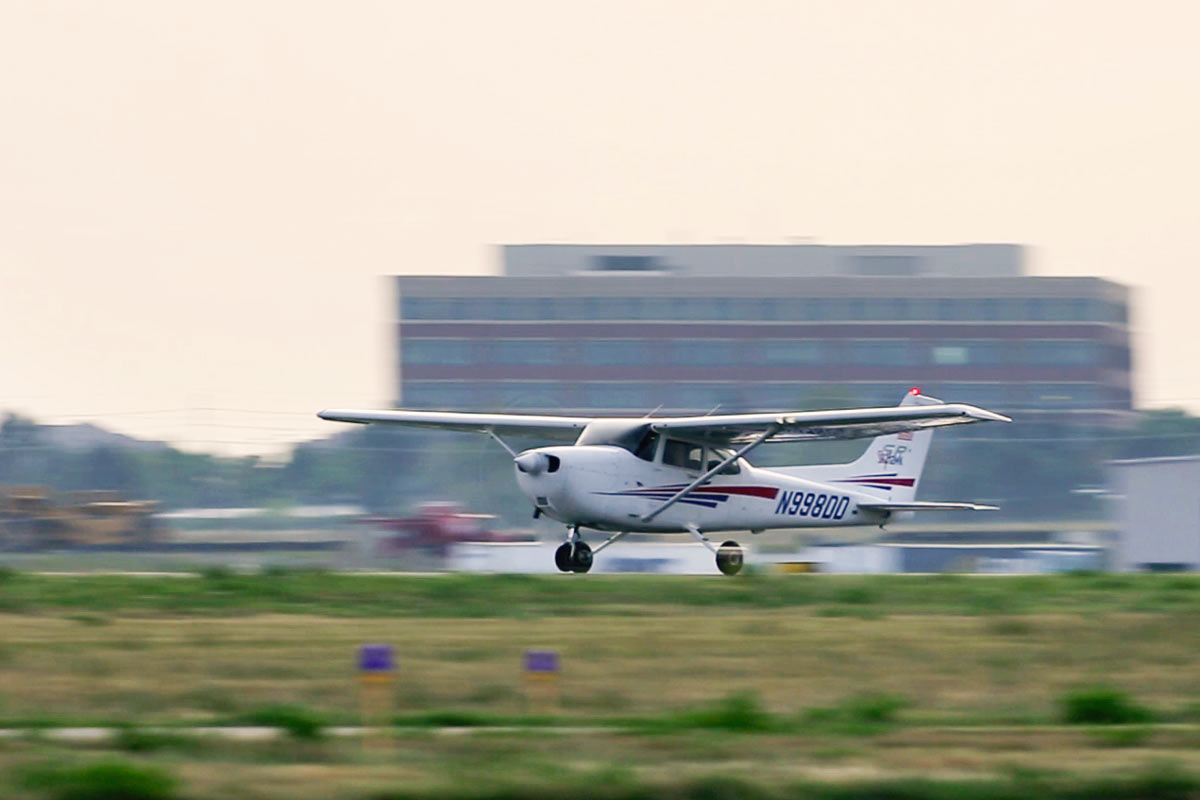
While there are plenty of reasons why you should reject a takeoff, the key is having a solid plan in place every time you advance the power for takeoff. Here's how to prepare for a rejected takeoff, and how to execute it.

Why Reject? Emergency And Abnormal Situations

Whether you're flying a Cessna Skyhawk or an Airbus A320, there are dozens of emergency and abnormal situations during the takeoff roll that could require you to perform a rejected takeoff. Here are some of the most common:

Loss of Engine Power
Door Popping Open
Runway Incursion
Low Oil Pressure / High Oil Temperature
Stall Protection / AOA Failure
Inadequate Acceleration
Engine Vibrations
Windshear
Any Kind of Fire
Loss Of Directional Control
ATC Takeoff Cancellation

If something seems wrong or out of place during any takeoff, reject the takeoff as early as possible at a slow speed.

Brief Your Takeoff Plan

Whether you're alone, flying with a friend, or flying with a crewmember, brief your rejected takeoff criteria. It's something every airline requires of its pilots, and something that every GA pilot will benefit from.

Verbalize the points at which you plan to take the aircraft airborne vs. reject the takeoff and stay on the runway. While you can't possibly name every possible scenario, highlighting these criteria will make it easy to make a go/no-go decision during takeoff.

If you're flying a piston airplane, you don't have the same high speed reject concerns that pilots flying jets face. Generally speaking, if you haven't lifted off the ground in a piston airplane and something goes wrong, your best bet is to stay on the ground.

Only take a problem airborne in small aircraft when you don't have runway remaining, or if it's a minor issue that you know can be easily dealt with.
Concerned About Runway Length? Use The 50/70 Rule

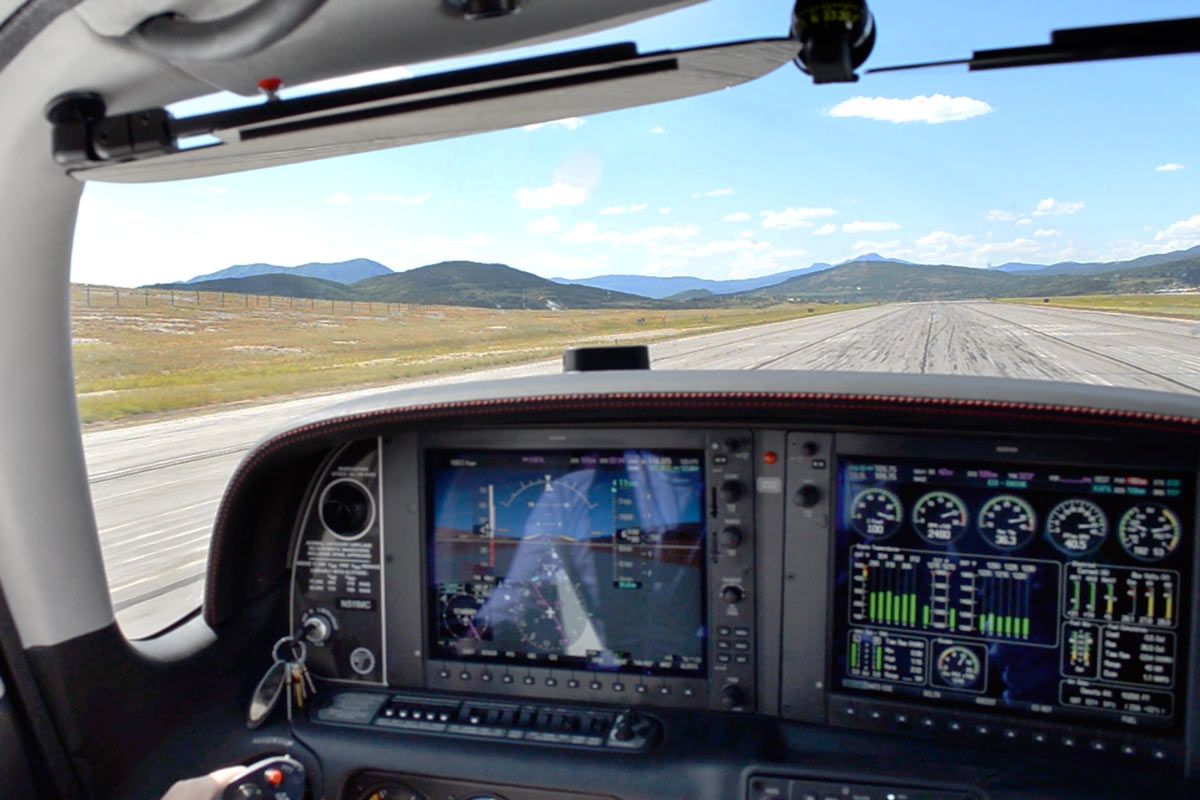
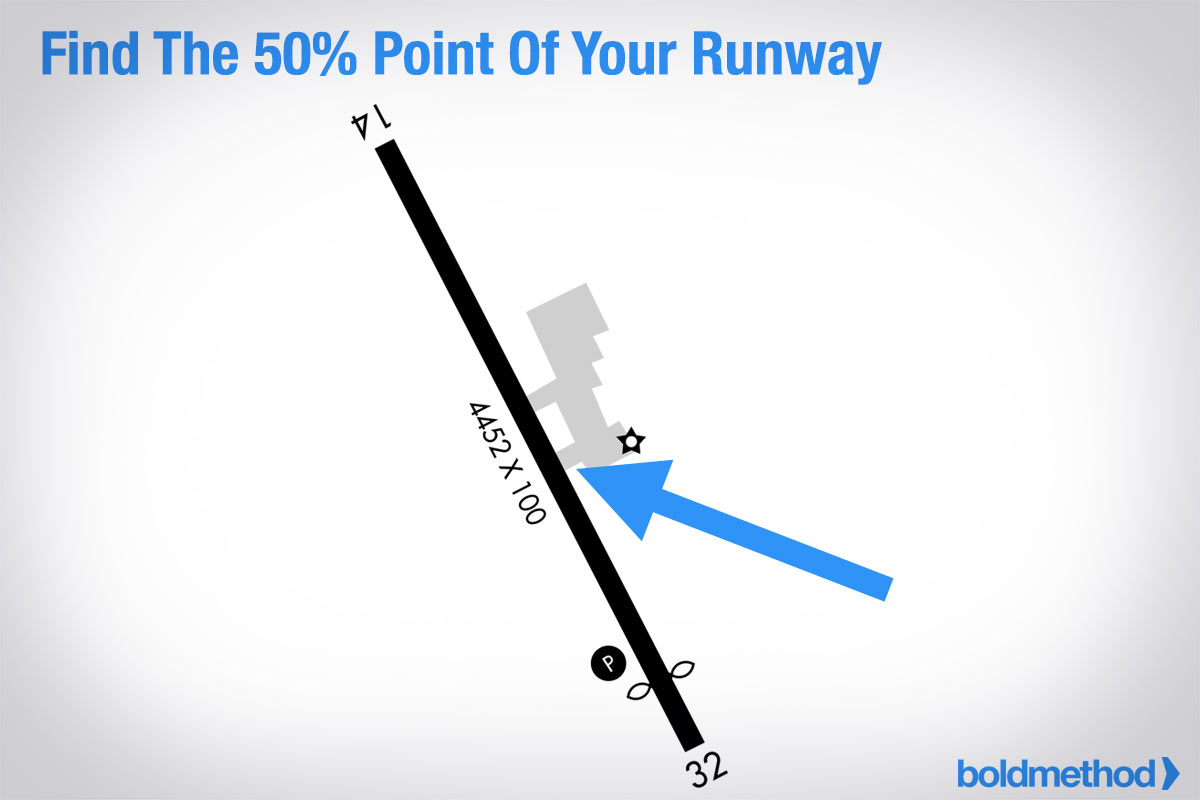
Will you lift off before you're out of runway? It's not a question you want to be asking yourself on your takeoff roll, especially as you approach rotation speed. If you haven't reached 70% of your takeoff speed by the time you've reached 50% of the length of the runway, you should abort your takeoff.

You should always use your takeoff performance charts to make sure you have enough runway for a safe takeoff. But after that, using the 50/70 rule gives you a very good insurance plan when you're rolling down the runway. If things don't go as planned and you're not getting the performance you expected during takeoff, you'll have a solid "abort takeoff" decision point, with plenty of room to stop.

Boldmethod

The FAA has the same suggestion in Chapter 5 of the Airplane Flying Handbook: "Prior to takeoff, the pilot should identify a point along the runway at which the airplane should be airborne. If that point is reached and the airplane is not airborne, immediate action should be taken to discontinue the takeoff. Properly planned and executed, the airplane can be stopped on the remaining runway without using extraordinary measures, such as excessive braking that may result in loss of directional control, airplane damage, and/or personal injury".

How To Execute a Rejected Takeoff

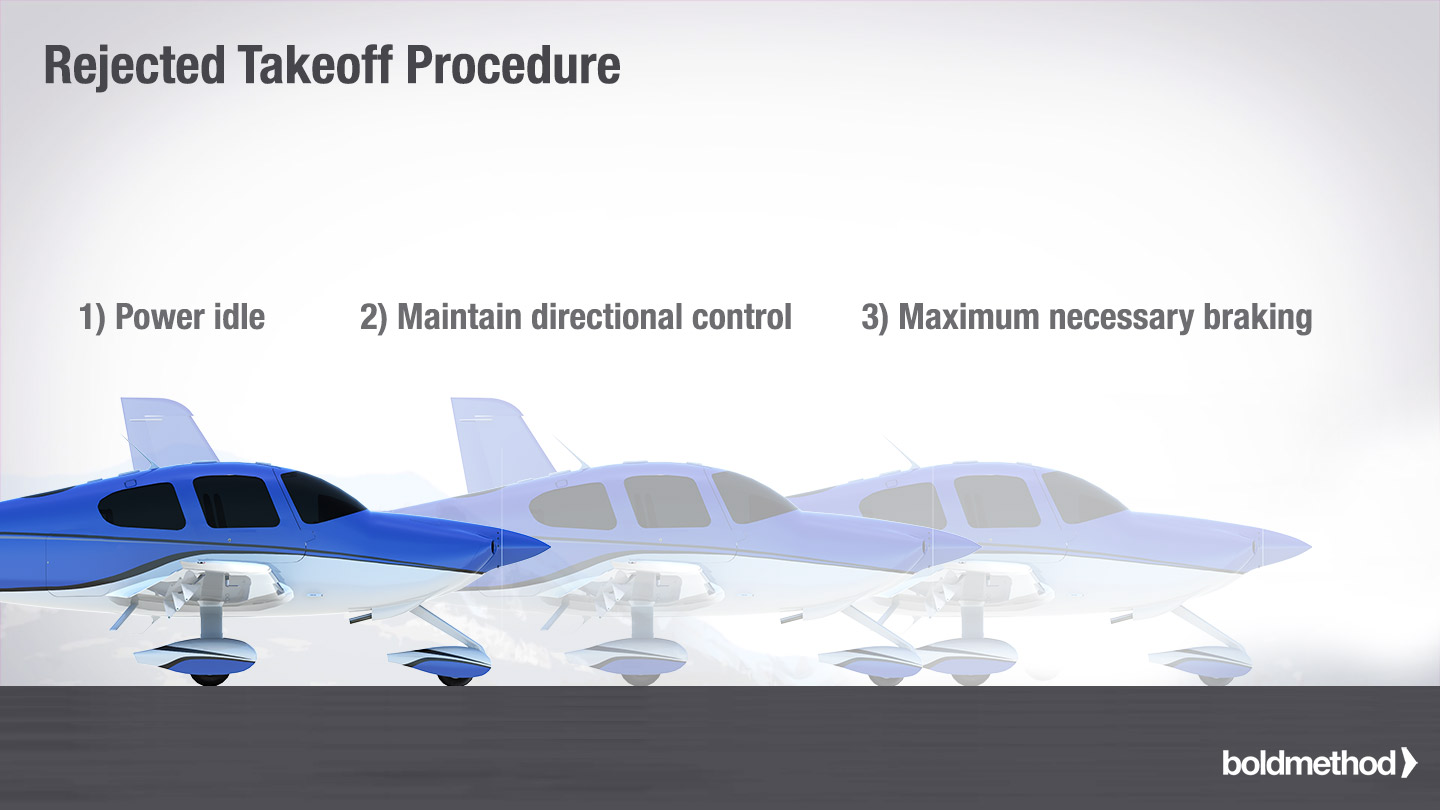
The general procedure for a rejected takeoff is simple: Power Idle, Maintain Directional Control, Maximum Necessary Braking.

Keep in mind, however, that you should always follow the procedure your aircraft manufacturer recommends. And if you reject a takeoff due to an engine fire, you may need to bring the mixture control to idle cutoff to stop fuel flow to the engine. Then, once you're stopped, follow the procedure for an engine fire on the ground.
Boldmethod

There are a few things you should take into consideration when performing "maximum necessary braking." If you're taking off on a runway with thousands of feet remaining, you probably don't need to aggressively brake as you reject the takeoff. With aerodynamic braking, you might not really need to use your brakes at all. Just use enough braking action to safely stop the aircraft before the end of the runway.

Why don't you want to aggressively brake? When you're near rotation speed, there isn't much weight on your tires, because your wings are generating lift. That means it's easier to lose directional control if you're aggressive on the brakes during a rejected takeoff.

On top of that, locking up a tire at high speed due to aggressive braking could cause a brake to lock or a tire to pop, making your situation even worse. When the FAA recommends "maximum necessary braking," you should only brake as much as required for the runway distance remaining.

Communicate Your Intentions

Once you've slowed down and the imminent threat has been avoided, communicate your intentions to ATC or other aircraft on the CTAF frequency. Let them know that you've rejected the takeoff, where you plan to exit the runway, and if you need any additional assistance.

Never rush to exit the runway if you've just rejected a takeoff. Take a deep breath, slow the airplane to a controllable speed, and find a safe place to exit the runway.





jueves, 30 de marzo de 2023

¿Qué es la Conciencia Situacional?

by Sarina Houston

Producciones de Getty / RubberBall

La conciencia situacional es un término comúnmente usado entre los pilotos y otros en el mundo de la aviación. El término a menudo se refiere a la conciencia de un piloto de la ubicación física del avión en el espacio, pero se extiende hacia afuera para incluir todos los factores relacionados con la seguridad del vuelo, y es una gran parte de la gestión de recursos de un solo piloto .

Un piloto que es consciente de la situación tiene una buena comprensión de la ubicación física del avión en relación con el espacio tridimensional.

¿A qué altitud está operando? ¿Cuál es su posición lateral en el espacio en relación con los aeropuertos y las ayudas a la navegación? ¿Cuán consciente es él de lo que le está sucediendo a él y su avión en este momento y qué va a pasar en el futuro?

Los cinco elementos de riesgo

La FAA establece que la conciencia situacional abarca los cinco elementos de riesgo, incluidos el vuelo, el piloto, el avión, el entorno y el tipo de operación. 

Un piloto se considera consciente de la situación cuando tiene una buena imagen mental general de lo que está sucediendo durante el vuelo. ¿Entiende las instrucciones ATC? ¿Sabe por qué su GPS le dice que vuele cierto rumbo? ¿Entiende por qué el piloto automático está sonando? ¿Recuerda cumplir con las listas de verificación? ¿Sabe dónde se encuentra geográficamente y puede navegar con éxito? ¿Puede predecir dónde estará en el futuro? Perder la conciencia en relación con cualquiera de estos factores puede conducir a una pérdida de conciencia situacional en general.

Otros factores

Pueden causar una pérdida de conocimiento de la situación y poner en riesgo la seguridad del vuelo, como la fatiga, el estrés y una gran carga de trabajo. La fijación de un problema en particular, en un solo instrumento o en un gráfico, puede significar que el piloto omite inadvertidamente otra información valiosa y puede conducir a una pérdida de conocimiento de la situación, ya sea geográfica o mentalmente.

Mantener una buena conciencia situacional requiere que el piloto esté atento, atento y perceptivo, incluso cuando las cosas van bien. Los pilotos pueden hacer varias cosas para mejorar su conocimiento de la situación: planificación previa al vuelo, mejorar las habilidades de palo y timón, familiarizarse con los sistemas de la aeronave y el rendimiento por adelantado, sentirse cómodo con la aviónica de la aeronave, usar servicios ATC cuando estén disponibles y muchos más. Todos estos elementos pueden ayudar a un piloto a mantener una conciencia situacional positiva durante un vuelo.

miércoles, 29 de marzo de 2023

Un 747 Aterriza con Tanta Fuerza que Rebota | Informe Viral


If You Go-Around On A Visual Approach Under IFR, Do You Need To Contact ATC Immediately?

02/25/2023

Thanks to Bose for making this story possible. Check out the full series here. And if you want to know why we fly with Bose, learn more about their headsets here.


Visual approaches are usually simple. But what if you're flying a visual approach under IFR to a non-towered airport and have to go-around? Should you contact ATC right away, or fly a visual traffic pattern and land? We talked to the FAA to find out more...

Planning Your Go-Around Is Usually Straightforward

When flying under IFR, you'll usually follow two kinds of missed approach instructions in the event of a go-around. If you're cleared to fly an instrument approach, you'll brief and plan to fly the published missed approach procedure on the chart. You can go missed on instrument approaches for plenty of reasons, like failing to make visual contact with the runway environment, conflicting traffic, etc.

You can find the published missed approach procedure in three places on an approach chart:A written missed approach procedure at the top of the page.
A graphically depicted missed approach on the "plan view" section of the chart (pictured below).
A series of graphics explaining each step of the missed approach directly above the "minimums" section of the approach plate.


But visual approaches are different, because there isn't a published missed approach procedure for visual approaches.

If you're flying into a towered airport and you lose contact with the runway environment, have a traffic conflict, or experience wind shear, among numerous other reasons, you'll have to go-around on your visual approach. You'll usually be assigned "fly runway heading" and a top altitude as the first part of the missed approach. A tower controller will usually then vector you back to the final approach course or ask you to join the traffic pattern to land.


What If There Isn't A Tower? This Jet Crew Faced An Unusual Situation.

Here's where things start to get tricky. What happens if you need to go-around when you haven't canceled IFR, and you're flying a visual approach to a non-towered airport? An ATP-rated corporate jet crew flying into Rifle, Colorado (KRIL) experienced this very situation. Here's the story from their NASA ASRS report:

Enroute to ZZZ we received a weather report which informed us that winds at ZZZ exceeded our tailwind landing limitations. Upon reaching Denver Center, we advised them of the weather at ZZZ and asked to be rerouted to our alternate RIL. Reroute was given and we continued toward our alternate. Denver Center issued weather alerts for moderate to severe turbulence in the Denver area including mountain wave activity due to high winds aloft. We then checked winds at RIL, showing that winds were light and slightly favoring Runway 26. Weather was also reporting VFR conditions. Denver Center vectored us south of RIL to avoid some of the reported turbulence and bring us into RIL from the west. We requested the RNAV (GPS) Y RWY 08 into RIL. We were cleared for the approach following crossing HUGSI to RNAV (GPS) Y RWY 08 and were requested to change frequencies to another Denver Center. Attempts to reach Denver Center on the new frequency were unsuccessful. We went back to the previous frequency where we were instructed to continue trying on the new frequency. Meanwhile, we heard other traffic being vectored for the approach to follow us into RIL. Upon reaching WOKPA we made contact with Denver Center. We had RIL in sight and let Denver Center know. Denver Center told us to contact CTAF at RIL and cancel with him in the air or on the ground. In hindsight our biggest mistake, we should have canceled when we had the visual. We transitioned to a visual approach and reported to CTAF a 3 mile final and short final visual RWY 08. Just before we changed frequencies we heard Denver talking to the aircraft to follow us was about 40 miles behind us.

Our approach to landing was smooth with light winds and no turbulence. It appeared to be an easy landing. At 30 ft AGL over the landing threshold airspeed increased around 15 knots above Vref and then the amber wind shear annunciator illuminated. We initiated a go-around and advised CTAF of our go-around and advised CTAF we would enter left traffic to return for a visual to RWY 08. We remained on CTAF while we cleaned up the aircraft for another visual to RWY 08. I contacted the aircraft to follow and requested their position and advised them of our intentions. I eventually made visual contact with the aircraft and extended our downwind to follow the aircraft. We made an uneventful landing. After landing and clear of the runway we contacted ATC to cancel our flight plan. A very irate ATC individual asked what we had done and told us we were still on an IFR flight plan and we needed to contact him on our go-around. Obviously realized he was right and told him we initiated a go-around for a wind shear alert stayed in VMC conditions communicated with CTAF our position and intentions. We also communicated with aircraft that was following us and advised them of our situation made visual contact to follow them.

In a post-flight debrief, we both realized since we did not cancel flight plan in the air we were technically still on an IFR flight plan. Though we were VMC, at an uncontrolled field our thoughts were focused on landing and not going around...

Did These Pilots Really Make A Mistake? We Called The FAA To Find Out More...

On a perfectly clear day with light winds, an unexpected go-around left this jet crew suddenly flying an unplanned traffic pattern back to the airport.

But did they really make a mistake by not contacting ATC? The interesting part of this report is that a few unlikely scenarios combined into one moment: continuing a visual approach without canceling IFR, a non-towered airport, an unexpected go-around in perfectly clear conditions, traffic in-trail to the same airport, and mountainous terrain making communication with ATC difficult. We reached out to a few FAA FSDOs to hear their thoughts.

We first called an ATC Center Control facility, and they referred us to speak with FAA Flight Standards officials at the FSDO. Just like pilots and controllers, the FAA Inspectors had different takes on the scenario. Many said the crew simply could have canceled IFR and proceeded under VFR rules.

But they also referred us to what's published in the AIM and Pilot/Controller Glossary.


The Answer Is Published

According to the FAA's Pilot/Controller Glossary, the term "Go-Around" is defined by the following criteria:

Instructions for a pilot to abandon his/her approach to landing. Additional instructions may follow. Unless otherwise advised by ATC, a VFR aircraft or an aircraft conducting visual approach should overfly the runway while climbing to traffic pattern altitude and enter the traffic pattern via the crosswind leg. A pilot on an IFR flight plan making an instrument approach should execute the published missed approach procedure or proceed as instructed by ATC; e.g., "Go around" (additional instructions if required).

Additionally, the FAA's Aeronautical Information Manual (AIM) covers go-arounds from visual approaches in section 5-4-62(e):

A visual approach is not an IAP and therefore has no missed approach segment. If a go-around is necessary for any reason, aircraft operating at controlled airports will be issued an appropriate advisory/clearance/instruction by the tower. At uncontrolled airports, aircraft are expected to remain clear of clouds and complete a landing as soon as possible. If a landing cannot be accomplished, the aircraft is expected to remain clear of clouds and contact ATC as soon as possible for further clearance. Separation from other IFR aircraft will be maintained under these circumstances.


The Pilot's Perspective

Due to the nature of NASA ASRS reports, we can only read the report from the pilots' perspective. Scenarios like this happen so infrequently that it's possible the controller wasn't aware of the AIM's recommendations for how to conduct go-arounds from a visual approach (in the event a crew did not cancel an IFR clearance).

At uncontrolled airports, until an IFR aircraft cancels their IFR clearance, no other IFR inbound aircraft are allowed in or out (even those on visual approaches). That's why most pilots cancel their IFR clearance on visual approaches, to free up the airspace for other pilots.

martes, 28 de marzo de 2023

The Importance of Lights


Making the Most of Approach Lights

A favorite information morsel from instrument training is “being able to descend to 100 feet AGL when you can see only the approach lights.” That’s too bad, because it belittles a beautiful piece of information design by turning it into a tool for aviation trivia night. It’s also wrong most of the time.


Let’s get the FAR misunderstanding out of the way first. The relevant snippets of FAR 91.175 are:

(c) … no pilot may operate an aircraft, except a military aircraft of the United States, below the authorized MDA or continue an approach below the authorized DA/DH unless—

(1) The aircraft is continuously in a position from which a descent to a landing on the intended runway can be made at a normal rate of descent using normal maneuvers …

(2) The flight visibility is not less than the visibility prescribed in the standard instrument approach being used; and

(3) Except for a Category II or Category III approach … at least one of the following visual references for the intended runway is distinctly visible and identifiable to the pilot:

(i) The approach light system, except that the pilot may not descend below 100 feet above the touchdown zone elevation using the approach lights as a reference unless the red terminating bars or the red side row bars are also distinctly visible and identifiable.

(ii) The …

Section (3) lists nine more things that fall into the general categories of “paint, pavement, or lights.” Summing all of this up it says: You can’t descend past DA/MDA unless you’re in a position to land and you have the required visibility and you have one of the references in sight. You need all three; in the U.S., anyway.

Nine of the references are on the runway, which means it’s entirely possible to reach DA or MDA, be in a position to land, see the approach lights—because they’re right in front of you, but not have the required visibility to descend further.

Thus, the approach lights are not a free ride to 100 feet AGL. (The forthcoming FAR 91.176 might be, if you have an enhanced vision flight system, but that’s another topic.)

The approach lights, however, are a great way to measure your visibility as well as bridge the gap between flying on instruments and a well-placed landing flare — if you know what you’re looking at.

The Whole 900 Yards: ALSF-2

Actually, a full ALSF-2 approach lighting system is usually 2400 feet, which is 800 yards, but I couldn’t resist the headline. It’ll also help you remember that this “Approach Light System with Flashers version 2” is the one with all the bells and whistles. Some sources say the “2” means it’s designed for Cat-II approaches. Take your pick; it’s what you’ll see on runways with Cat-II and Cat-III ILS approaches.

Approach lights accomplish two tasks: orientation and measurement. If the approach is close to minimums, both things happen in a couple seconds, so it pays to understand everything the lights tell.


It’s helpful to think about the ALSF-2 as having an outer section and an inner section. The outer section usually consists of 14 rows of five white lights placed every 100 feet. I say “usually” because for an ILS with a glideslope of less than 2.75 degrees, six more rows are added further from the runway, making the whole system 3000 feet instead of 2400 feet.

This is really important. On a flatter glideslope, you’ll be further from the threshold when you reach a standard DA of 200 feet above touchdown zone elevation (TDZE). If those extra lights weren’t there, filling the space between you and the runway, the entire light system would appear too far away—and you’d believe you’re too low. There’s a good chance in low visibility, you’ll see the approach lights several seconds before you can see a visual glideslope indicator (a.k.a., a VGSI, such as a PAPI or VASI).

Conversely, reaching DA on an unusually steep glide path can give the impression that you’re too high. The takeaway is that if the descent angle has worked for the entire approach until now, don’t let the lights convince you to change it before you see a VGSI.

In addition to the 14 rows of white lights, the outer section of the ALSF-2 lighting contains flashing lights timed for an illusion of a white ball traveling towards the runway twice per second. This aids your acquisition of the lights — we naturally look to flashing things — and suggests the best direction to search if you want to find a safe place to land. That’s useful orientation.

The inner section of the ALSF-2 begins 1000 feet from the threshold with a 100-foot-wide bar of white lights. Sometimes called the “decision bar” or “roll bar,” one of its jobs is helping you align your roll attitude with the actual pavement. Fly a few approaches to minimums in driving rain and you’ll understand how those approach lights might emerge from the miasma off one side of the nose and at a roll angle not quite matching your own. The roll bar gives a bright visual reference as you get everything in alignment.

The flashing lights stop at the roll bar, but the center rows of five white lights continue guiding you to the runway threshold and centerline. Halfway there, 500 feet from the threshold, there is a short white bar of three lights on each side (sometimes referred to as a barrette). It’s like a mini roll bar that’s really for the Cat-II folks who need all the visuals they can get.

The inner 1000 feet of the ALSF-2 lighting also contains two strips of red lights, one on each side. These are the red side row bars mentioned in FAR 91.175 that you must have in sight to descend below 100 AGL with only the approach lights in sight. Their purpose is primarily to remind you this area is actually short of the runway. You need to cross the green threshold lights and touchdown on the real runway centerline. Cat-II and Cat-III runways have lights in the pavement that look like the ALSF-2, but those are technically part of the runway light system.

So where are the red terminating bars mentioned in FAR 91.175? They’re on an ALSF-1. In other words, you will see either the red side row bars OR the red terminating bars, but never both. They’re also explained in the video on this page, along with a plain-language explanation of the nine other approach light systems. It sounds boring, but the acronym (SSALR, MALSF, etc.) soup is straightforward code that mostly describes the ALSF-2 with parts missing. Watch the video and you can clean up on aviation trivia night.

Using the Yardstick

So far we’ve talked about how the sequenced flashers and shape of the lights might orient you towards the runway. Now that you’re an ALSF-2 Illuminati, it’s time to add measurement.

It’s no coincidence that most Cat-I ILS and LPV approaches require 2400 feet (1/2 SM) visibility and the ALSF-2 is (usually) 2400 feet long. In fact, any ILS or LPV with a visibility requirement of less than 3/4-mile must have an ALSF-2, ALSF-1, SSALR, or MALSR (see video), all of which are 2400 feet long.

When you reach 200 feet AGL on a standard three-degree glideslope, you’re about 2800 feet from the threshold. If you can see the far end of that approach light system, you have the required visibility to continue.

If you can see only to the 500-foot barrette, visibility is closer to 2300 feet. I’m not one to quibble over 100 feet, so I’d understand continuing for landing presuming I could see that far. However, I’ll reiterate: Even though the ALSF-2 provides some roll and yaw information, it says nothing about glideslope. The PAPI or VASI is about 1000 feet beyond the threshold, so fly attitude and resist changing pitch. With only 2400 feet of visibility, you probably won’t see the VGSI until the roll bar has passed under the nose.

If you reach a 200-foot DA and can’t see the roll bar, you have less than 1800 feet of visibility. RVR 1800 ILS approaches exist, but it most cases, failure to see the roll bar by DA requires executing a missed approach, even though you can see 1400 feet of the approach light system ahead of you.

It’s interesting to note that if you can’t see past the roll bar, you can’t see “the red terminating bars or the red side row bars.” So maybe a better read of FAR 91.175 (c)(3)(i) would say you could descend if you have, “… the approach light system, except if it’s an ALSF-2 and you can’t see some of those red side lights, just go around now.”


sábado, 25 de marzo de 2023

Diamond DA20 (Perfect Flight Training Aircraft)

“Sporty. Sleek. Exciting. Yet surprisingly affordable.” This is how Diamond Aircraft Industries describes their DA20 Katana. When student pilots, CFIs, and flight schools consider their choices for trainer aircraft, the list naturally includes traditional time-honored classics like the Cessna 150, Cessna 152, and Piper Cub, but another prime contender for the perfect flight training aircraft is the much newer and currently still in production Diamond DA20. This Austrian-designed tricycle gear plane checks the boxes for the performance and handling characteristics pilots are looking for in a two-place trainer with the added bonus of an attractively sporty style.


History of Diamond Aircraft Industries


The DA20’s parent company, Diamond Aircraft Industries, is an Austrian based aircraft manufacturer that got its start in 1981 with a motor glider aircraft known as the HK36 Dimona. The Dimona was designed with the premise of creating a high quality, high performance aircraft that could be sold at a competitive price.


The Dimona was a commercial success and paved the way for a series of light aircraft through the 1990s followed by multi-engine and unmanned aerial vehicles (UAVs) after 2000. The DA20 is part of the lineage and legacy of Diamond’s light aircraft success.


Designing the Diamond DA20

The plane that we in North America know as the DA20 was originally called the DV20 for its 1993 Austrian release. To support North American demand for the aircraft, Diamond opened a manufacturing operation in Canada and the Canadian built versions that first appeared on the market in 1995 were given the DA20 name.

The premise behind the Diamond DA20 was to continue to branch out from gliders, develop a successful light aircraft line, and create an aircraft that pilots would appreciate while making it unique enough to avoid any head-to-head direct comparisons with other planes. The already successful Diamond HK36 Dimona was used as a starting point for envisioning the DA20 Katana.

When drafting the Katana, the design team also drew heavily on their history with gliders. This is readily apparent in areas like the impressive glide ratio of 11:1 or 14:1 depending on the variant of the aircraft. As with a glider the ride was designed to be quiet – so quiet in fact that headsets or use of the integrated intercom system are often unnecessary for communication between the pilot and passenger.

The Diamond DA20 was designed with optimum performance in mind, so the team focused in on addressing the handling characteristics and aircraft features that would help new student pilots to safely develop their skills. For instance, it is well known that the first few (or more) landings that student pilots make are likely to be bumpy and rough. Some planes would have trouble accommodating these less than perfect landings, but the DA20 is very forgiving of a bit of inadvertent rough handling.

The designers gave the DA20’s landing gear a rugged spring aluminum construction and paired it with an elastomeric-shock nose gear. This configuration was found to hold up to the rigors of flight training while having the added benefit of being nearly maintenance free.

Distinctive Design Features of the Diamond DA20


Throughout the design process, the Diamond team targeted quality, performance, unique features, and the ability to deliver all of this at a very competitive price. The distinctive design features that set the DA20 apart from its competition include:

Composite Construction

Strength and durability are the hallmarks of the DA20’s composite construction. The composite airframe is made of fiberglass and carbon-fiber reinforced plastic. With this composite construction, the DA20 has no defined structural life limit and could conceivably live forever if well cared for. This means it is also more well-suited to endure the use and abuse that a novice pilot is apt to put it through.

Cockpit Visibility

One of the first things student pilots fall in love with is the amazing visibility they have in a Diamond DA20 cockpit. The wraparound design of the canopy and rear windows (in some variants) maximizes the amount of glass while a seating position forward of the wings affords excellent visibility in all directions. New pilots especially appreciate how much easier it is to spot other traffic and to visually navigate in a DA20.

Cockpit Comfort

The designers made sure that the pilot and passenger (or CFI) would be comfortable throughout the flight. The sporty cockpit includes ergonomically designed luxurious bucket seats with a 26 G rated safety design. Available in your choice of leather or sheepskin. A 4-point safety harness integrates with the seat to provide secure yet comfortable safety.

Easy Maintenance

The upkeep for a DA20 is straightforward and minimal. Thanks to the smooth, corrosion resistant finish and lack of rivets, the airframe will stand up to weather and other environmental stressors without much assistance. Inspections are also streamlined thanks to transparent Plexiglas panels in the wings that allow key control elements to be viewed and inspected without disassembling the aircraft.

Flying the Diamond DA20

Diamond describes the DA20 piloting experience saying, “Imagine taking your favorite sports car and adding wings. That’s the feeling you get when you strap into the two-seat DA20 and take to the sky. Sporty, sleek and exciting, yet surprisingly affordable, the DA20 offers outstanding performance, with impressive durability and economy for commercial training.”

Accessing the DA20 through the fighter pilot inspired canopy sets the stage for the performance that is to come. The center stick push-rod controls are highly responsive and although your CFI will not appreciate you trying it out as a student pilot, the DA20 is spin certified.

While in the air, it is easy to spot approaching aircraft and to navigate thanks to the excellent cockpit visibility provided by the wraparound canopy and forward positioned seats. The easy handling DA20 is designed so that the ailerons can maintain effectiveness even after the wing roots have begun to stall. This gives a new pilot time to recognize and correct an impending stall. In AOPA’s review of the C1 Diamond DA20 variant, they note that it shows, “a good compromise between being too benign to teach anything and too sharp for neophyte pilots.” Well-balanced control forces also reduce the frequency of the need to trim.

When it is time to land, the tricycle gear configuration with forgiving rugged spring aluminum main landing gear and elastomeric-shock nose gear eases the learning curve. Even if a gust comes up, the DA20 is stable having a 20-knot demonstrated cross wind landing component.

Pilots who are looking for a plane that will take them from first flight all the way through night VFR training will appreciate the DA20’s EASA night VFR certification status although it should be noted that the DA20 is not IFR certified.

Tour the DA20 with MojoGrip to learn about its features, flight characteristics, and how it compares to its big brother the four-place DA40. For reference, MojoGrip is reviewing the original Rotax engine model of the DA20 which can be purchased used for around $49,000 compared to the roughly $200,000 price of the current C1 model.

Variants of the Diamond DA20

The original Diamond DV20-A1 Katana in Austia and DA20-A1 Katana in Canada were followed by other variants plus a spinoff into the four-place DA40.

The most frequently seen variant, particularly as a trainer, is the DA20-C1 Katana released in 1998. The C1 Katana saw the replacement of the A1’s 80 horsepower Rotax engine with a 125 horsepower Continental which also led to significant advances in both max cruise speed and sea-level rate of climb. In the cockpit, although you can opt for conventional flight instrumentation, the DA20-C1 also comes with a choice of either the Aspen EFD 1000 or Garmin G500 glass.

In 1999, Diamond released the DA20-100 Katana 100 engineered for the European market. The Katana 100 was repowered by the 100 horsepower Rotax 912S rather than the 80 horsepower Rotax 912 that was installed in the original DV20-A1s and DA20-A1s. This improved cruise performance and increased the service ceiling from 14,000 to 17,600 feet.

A more affordable trainer option for flight schools, the DA20-C1 Evolution is essentially a stripped-down C1 Katana without the rear windows but with the same engine while the DA20-C1 Eclipse includes the rear windows and is equipped for private use.

The final variant is the military trainer DA20-C1 Falcon. In the Falcon, the instruments were repositioned in front of the right student seat so the stick would be in the right hand and throttle in the left like a fighter plane.

Operational History of the DA20

The original DA20 and its variants have been put into service at many flight training schools as well as by military branches in Ecuador and Poland. In the United States, Embry-Riddle Aeronautical University provided the United States Air Force Academy with DA20-C1 Falcons for a now discontinued Academy Flight Screening (AFS) program. A contracted fleet of DA-20s is used by the United States Air Force for providing an Initial Flight Training (IFT) screening program.
Diamond DA20-C1 Katana SpecificationsEngine: Continental IO-240-B32B four cylinder
Horsepower: 125 hp
Propeller: 2 x Sensenich 2 blade fixed pitch
Length: 23 feet 9 inches
Height: 7 feet 1 inch
Wing Span: 35 feet 9 inches
Seats: 2
Empty Weight: 1,180 pounds
Maximum Gross Weight: 1,764 pounds
Maximum Takeoff Weight: 1,764 pounds
Useful Load: 584 pounds
Fuel Capacity: 24 gallons
Diamond DA20-C1 Katana PerformanceTakeoff Distance Ground Roll: 1,256 feet
Takeoff Over 50 ft. Obstacle: 1,640 feet
Rate of Climb, Sea Level: 830 feet per minute
Top Speed: 188 miles per hour
Cruise Speed: 130 knots
Stall Speed: 36 knots
Fuel Consumption at 55% (8,000 ft): 5.3 gallons per hour
Range at 55% (8,000 ft): 525 nautical miles
Service Ceiling: 13,100 feet
Landing Ground Roll: 661 feet
Landing Over 50 ft. Obstacle: 1,360 feet